

How to Install Downlights: A Practical Step-by-Step Guide
Installing downlights involves planning the layout, checking the ceiling, confirming the product specification, preparing each opening, connecting the specified electrical components, securing the fittings, and testing the completed installation. The sequence looks straightforward. Fixed wiring still carries electrical and fire risks, so the person performing that work must meet the rules that apply at the project location.
Start with the exact model. Its cut-out, voltage, driver, mounting method, clearance, and environmental rating determine the installation.
What Do You Need When Installing Downlights?
Collect the product instructions before marking the ceiling. They provide the required dimensions and limits.
Tools and Materials Checklist
|
Item |
Installation use |
|
Tape measure and pencil |
Mark the layout and hole centres |
|
Chalk line or laser |
Keep rows aligned across the ceiling |
|
Cable, pipe, and stud detector |
Screen the proposed positions for hidden services and framing |
|
Small drill bit |
Make a pilot hole after the position has been checked |
|
Hole saw or plasterboard saw |
Form the opening to the specified cut-out size |
|
Screwdrivers and approved connectors |
Complete the connection specified for the fitting |
|
Suitable voltage tester |
Support the safe-isolation procedure |
|
Downlight, lamp, driver, or junction box |
Complete the product-specific assembly |
The list changes with the ceiling material and downlight design. Concrete, suspended, surface-mounted, and recessed installations use different preparation methods.
How Should You Plan the Downlight Layout?
Define the lighting task before marking holes. Kitchens may need light over preparation areas, while displays may need directional coverage. Room dimensions, fixture output, beam distribution, ceiling height, and furniture affect quantity and spacing.
Mark the Ceiling
Use the ceiling plan to place each centre point. Check row alignment from more than one direction.
Keep proposed positions clear of joists, cables, pipes, ductwork, insulation, and other services. The required separation around a fitting comes from its instructions and the ceiling construction. Complete these checks before drilling a full-size opening.
Decide How Many Downlights You Need
Use the lighting plan, available photometric data, and selected fixture output. Divide large rooms into separate lighting tasks.
For a commercial project, review the fixture schedule alongside the guide to commercial LED downlights. This keeps the installation layout tied to the intended product and application.
How Do You Check the Ceiling Before Cutting?
Where access is available, locate framing, wiring, plumbing, ventilation, and insulation. Compare the depth with the full fitting and driver assembly.
Without access above, use suitable detection methods and screen the proposed pilot hole. Uncertain hidden services require further inspection or a different position.
The ceiling material also matters. A recessed downlight needs an opening and enough space for its retaining system. A surface-mounted model uses a base or bracket, so its fixing points and cable entry require a different check.
Which Downlight Specifications Must You Confirm?
Read the model label, drawing, and installation sheet. Confirm voltage, cut-out, depth, driver, mounting, dimming compatibility, and environmental rating. Record the model code.
Cut-Out Size
The cut-out receives the fitting body and retaining clips. Use the specified dimension rather than the visible trim diameter. An oversized hole may prevent secure mounting.
Integrated LED or Replaceable Lamp
An integrated LED downlight contains the LED light source as part of the fitting. A replaceable-lamp downlight uses a separate compatible lamp, such as a lamp installed in a suitable holder. The two structures affect the parts list and the later replacement process.
Fire and Moisture Requirements
Recessed openings can affect the performance of a ceiling assembly. Wet or damp locations also introduce environmental requirements. Select fire-rated, acoustic-rated, or IP-rated products when the building design, installation zone, product specification, or local rules call for them. Confirm the rating on the exact ordered model.
Sampo Lighting supplies LED downlights and related lighting products. Product dimensions, ratings, drivers, and control functions should be matched by SKU before openings are cut.
How Do You Isolate the Electrical Supply?
Identify the correct circuit and isolation device. Switch off and secure the relevant supply, then verify the circuit state with a suitable test method. Prove the tester under the applicable isolation procedure.
Fixed wiring, circuit changes, and regulated locations may require a qualified electrician. Local rules determine who can perform and certify the work. Spring clips cover one mechanical step;the electrical work requires the specified competence.
How Do You Cut the Ceiling Opening?
Check the centre mark again. Make a small pilot hole only after the location has been screened. Use the pilot opening to confirm that the intended space remains clear.
Mark the manufacturer’s cut-out diameter. Use a matching hole saw on suitable board or follow the marked line with a plasterboard saw. Protect the edge needed by the retaining clips.
Stop if the cut exposes an obstruction or reveals a ceiling construction that differs from the plan. Reassess the position before removing more material.
How Do You Connect and Mount the Downlight?
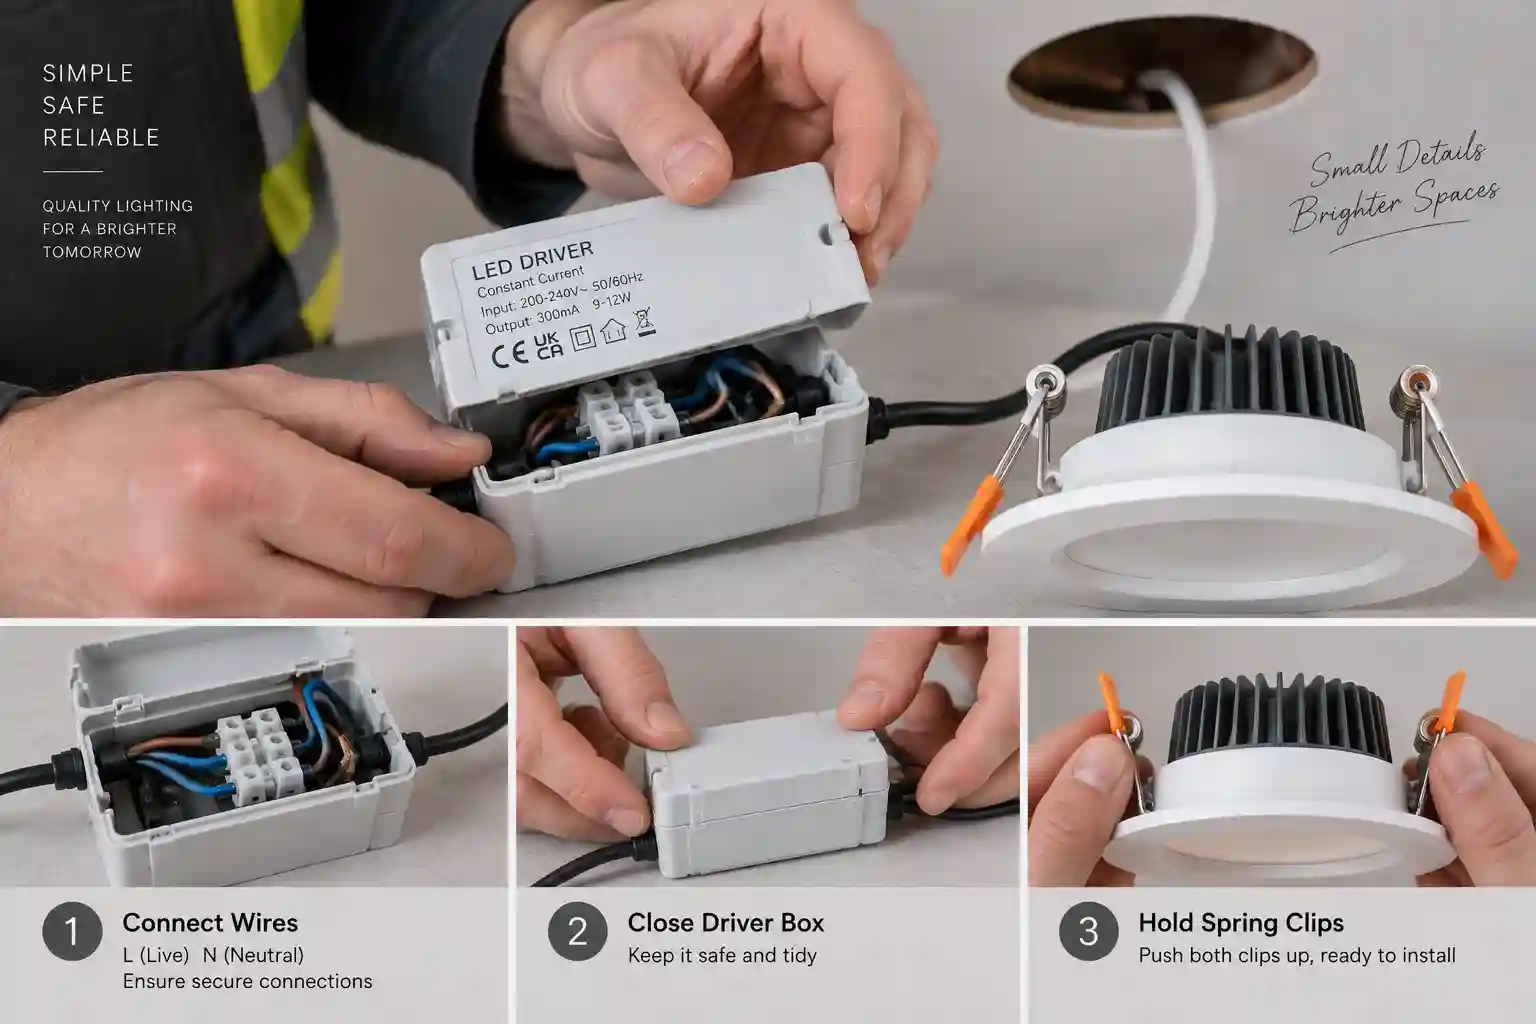
Bring the prepared cable to the opening without damaging its insulation. Connect the luminaire, driver, lamp holder, or junction component according to the product wiring diagram and the applicable electrical rules. Use only components specified as compatible with the selected fitting and control method.
Place remote drivers and connectors within the product’s access, ventilation, insulation, and clearance conditions.
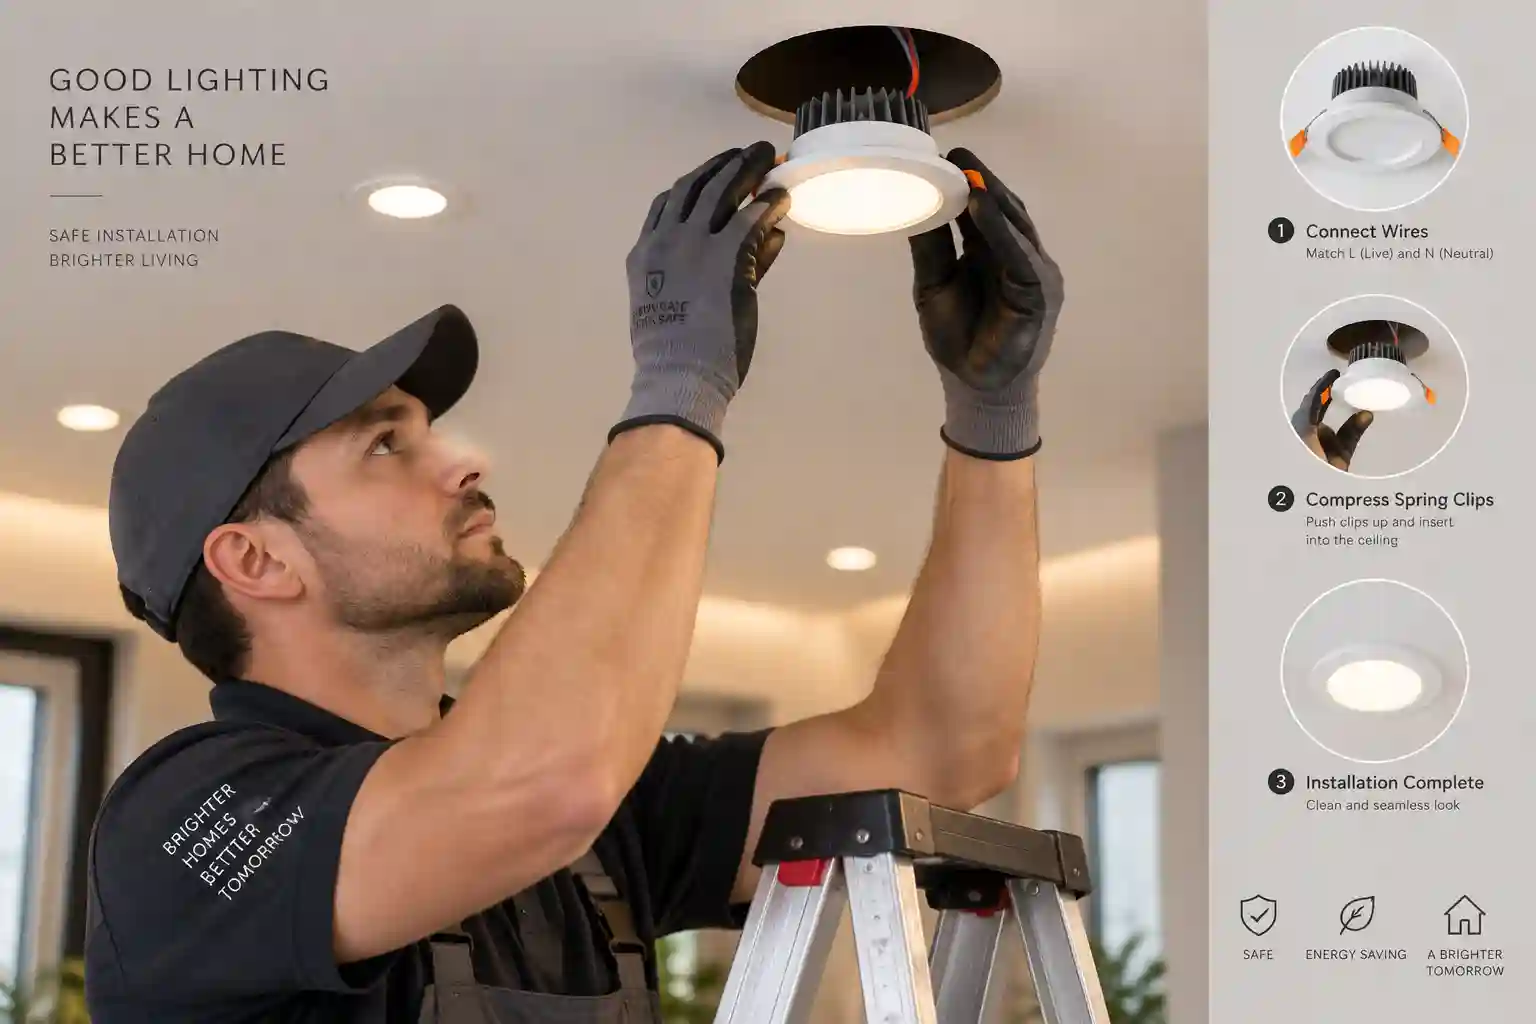
Fold back the springs or operate the supplied retaining mechanism. Guide the body into the opening, release the clips carefully, and seat the trim evenly against the ceiling. Surface-mounted products use their stated base, bracket, and fixings instead.
How Do You Test the Installation?
Before restoring power, check that every connection is enclosed, each conductor is positioned correctly, and each fitting is secure. Confirm the driver, lamp, dimmer, and downlight model belong to the approved configuration. Clear tools and loose material from the work area.
Restore the circuit under the project procedure. Check operation and control response. Flicker, intermittent operation, noise, damage, or unexpected heat calls for isolation and competent investigation.
For multi-room or commercial work, prepare the ceiling plan, fixture quantity, cut-out size, driver requirement, control method, and destination-market document requirements. A lighting system consultation can use these inputs to connect the product schedule with the installation plan.
What Common Installation Problems Should You Check?
Match each symptom to the product structure and installation record before replacing parts.
The Downlight Does Not Fit the Opening
Check the specified cut-out, ceiling thickness, clip position, and available depth. An obstruction above the ceiling can prevent the fitting from seating even when the opening diameter is correct.
A Downlight Flickers After Installation
Review the lamp or LED module, driver, dimmer, control device, supply, and connections as one configuration. Flicker can involve compatibility or an electrical fault. Isolate the circuit before inspection.
One Downlight Does Not Turn On
Confirm whether the product uses a replaceable lamp, an integrated LED module, or a separate driver. That structure determines which component can be tested or replaced. Follow the product service instructions and keep the original model code available.
Complete the Installation Around the Product Specification
Installing downlights starts with an accurate layout and ends with a documented, tested fixture schedule. The cut-out, ceiling condition, electrical architecture, driver, control method, and required ratings all belong to the same decision.
Foshan Sampo Lighting & Electric Co., Ltd. supplies LED downlights, track lights, lighting tracks, and related parts for residential and commercial lighting systems. Send the ceiling type, project use, supply voltage, downlight type, quantity, cut-out requirement, driver or dimming method, required ratings, destination market, and drawings when you request a project quotation. The response can identify the applicable product family, accessories, configuration, and quotation basis.
FAQ
Q1: Is DIY downlight installation permitted?
A: Mechanical tasks such as marking an approved layout may be possible for a person with the required skills. Fixed wiring, circuit changes, testing, and certification must follow local rules and may require a qualified electrician.
Q2: When is an electrician required for LED downlights?
A: Use a qualified electrician when the work involves new wiring, changes to a fixed circuit, regulated locations, or a legal requirement for professional installation or certification. The applicable rule depends on the project location.
Q3: How is the correct downlight cut-out size identified?
A: Use the cut-out dimension stated for the exact downlight model. Measure the required ceiling opening rather than the outside diameter of the visible trim.
Q4: Can downlights be installed without access above the ceiling?
A: Installation may be possible when the hidden space, services, wiring route, product depth, and driver position can be checked safely. An uncertain ceiling condition requires further inspection before a full-size hole is cut.
Q5: Do bathroom downlights need an IP rating?
A: The required IP rating depends on the installation zone, local rules, and the bathroom design. Select a downlight whose documented rating covers the intended location, and confirm the exact model before installation.


